Tuesday 30 March 2010

Playing with a new background effect ......

I came across this technique on Val Brincheck's blog - it's a way of creating a "rusty" metallic appearance on your cards and has the intriguing name of "Drunken Scotch"!  Check out the full instructions for trying this out by clicking on the link above and then click onto the post for 17th March.  It's a pretty simple, straightforward technique involving spreading water-based glue over the base card, dribbling alcohol inks over the top and then heating it all up with a heat gun. 

For my cards I used PVA glue (all that I had) and experimented with a variety of alcohol inks (mainly Butterscotch, Terra Cotta, Red Pepper, Aqua, Lettuce and Pool).  Here are the results:-

I dropped the ink on this card in "puddles" so the colours didn't seem to blend together so well.

See how much more the colours have blended together here because I trailed the ink across the cards.

I love the colour combination in this card - Buttercotch, Aqua and Lettuce.


As you heat up the ink, the glue creates bubbles, which gradually sink back down onto the surface.  As you can see on this card, I touched the surface with my finger before the ink/glue had completely dried and it pulled some of it off, revealing the white card underneath (see top left of card) - not a problem, I'll just cover up that part of the card with an image or embellishment.


Here I've covered a 5" x 5" mountboard square and I'll be using this as the base background for my "Heavy Metal" page in the Grunge Chunky Book.  (Haven't decided what else will be going on this page yet though)!

Friday 26 March 2010

Nature's Beauty No 2

I created a second version of my "Nature's Beauty" ATC and, as promised, here are the step-by-step instructions for making your own version of this card - I've given a list of the items I used, but don't think you have to follow it exactly - use what you have in your stash and alter some of the embellishments or images.

You will need:

Card 2.5" x 3.5" for the base; paper created with a SpinArt machine, using acrylic paint or alcohol inks (or alternatively you can use some decorative paper); a vintage female image; double-sided adhesive sheet & tape; thin ribbon; 2 x paper flowers (different sizes); text and word stamps; black Archival ink; glue dot; embroidered brad; 2 x butterfly images (mine were from Crafty Individuals); Glossy Accents; Beadazzles; black pen; gold metallic rub-on; and gold Krylon pen.

(Apologies that a couple of the photos aren't as sharp as they should be - I only discovered, too late, that I'd set the camera into the wrong position)!


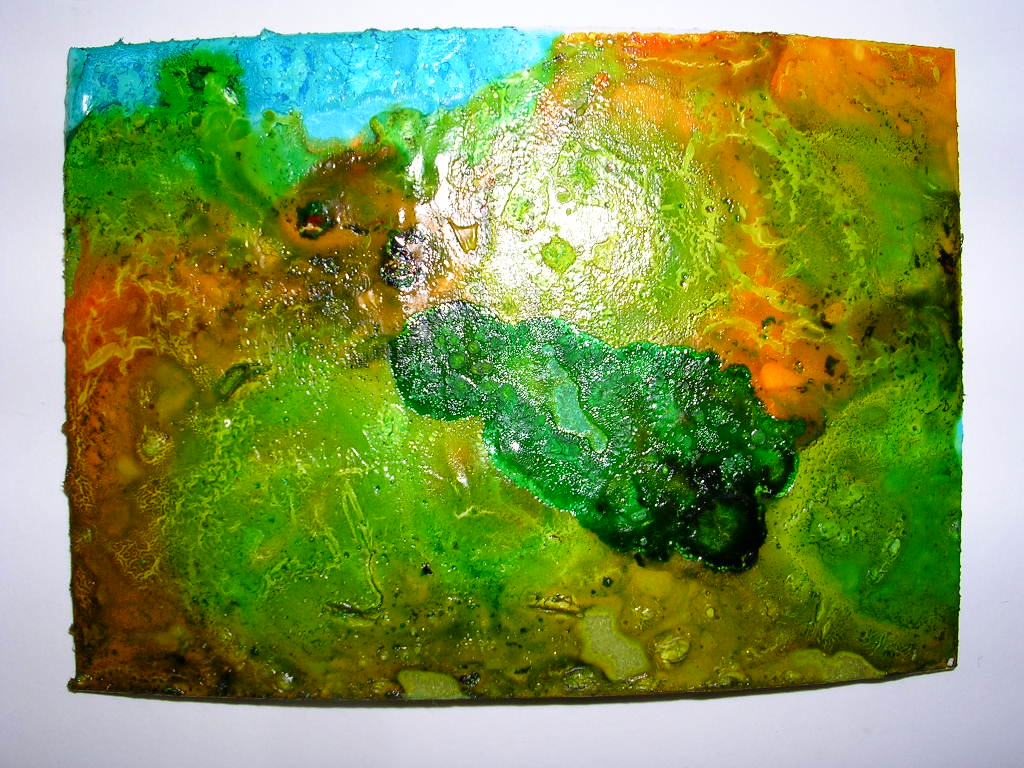
Step 1:  I began by taking a piece of card that I'd previously created with acrylic paints and a SpinArt machine (this is really fun to use, but messy - you need to sit it in a box whilst you're doing the spinning or you'll end up with paint and ink everywhere!  I picked mine up on EBay for a small amount of money, so worth keeping a lookout for one - car boots or charity shops might also be a good hunting ground) and adhered a portion of it to the ATC base.


Step 2:  Cover the back of the vintage female image with double-sided adhesive sheet and cut around the outline.  Decide where you will place it on the ATC (but don't stick it down yet)!


Step 3:  Using a craft knife, carefully cut slits around the hands, waist, etc, and wrap the body with some thin ribbon, threading it through the slits and securing it onto the sticky back of the image.  (A cocktail stick or pricking tool is very useful for pushing the ribbon through the slits).


Step 4:  Overstamp the larger of the two paper flowers with your text stamp, using the black Archival ink.


Step 5:  Place the flower (like a halo) behind the head of the image and when you are happy with the position of them both, stick the flower down with a glue dot, remove the peel-off backing from the image and stick that down too.


Step 6:  Stamp the smaller flower in the same way that you did with the first flower, add an embroidered (or other patterned) brad to the centre and attach to the bottom right-hand side of the card.  Add more ribbon, using double-sided tape, at an angle across the top right, and stamp the word 'Beauty' (or your choice) down the right-hand edge.


Step 7:  With your finger, smooth a little metallic gold rub-on around the card and over the flowers.  Edge the card using a gold Krylon pen.  (Add decorative paper to the back of the card to cover the brad prongs). 


"Nature's Beauty No 2"
(the finished card)
   
Step 8:  Cut out two butterflies and stick to the card, either side of the female image.  Cover with Glossy Accents and sprinkle a few Beadazzles along the butterfly bodies.  Use a black permanent pen to drawn in antennae.

Hope you enjoyed seeing how I created this card and will want to have a go at making your own version - let me know how you get on!


Thursday 25 March 2010

Dream a Little Dream

I had a lovely surprise in the post this morning as I received this beautiful ATC from Sandra Zengler, one of my online friends, which she had created after reading my step-by-step instructions on how I put together my "Fill Your Day with Joy" card.  Sandra's bird stamp was in portrait rather than landscape, so she realigned all the elements and made it her own design - Sandra has used a glitter pen around the card edges rather than a Krylon pen and added the eyelet and fibres to the bottom of the ATC.  And of course, I love the extra "beady" embellishment!  Thank you, Sandra, for a gorgeous card and it 's great to see how my initial idea has been interpreted ......


..... and if anyone else has had a go at making their own version of this card, then I'd love to see how they turned out.

Tomorrow (time allowing) I'll post the promised step-by-step instructions for my "Nature's Beauty" ATC. 


Tuesday 23 March 2010

Some more Vintage Children Pics

Here are more vintage images of children for you from my collection of cabinet cards, please feel free to use them in your artwork and on your ATCs.  I find these old photographs fascinating to study, the more you look at them the more you see in them - I love the little dolls (one of which is wearing a knitted dress) in two of the pictures and the solemnity on the faces of the children because they had to stay so still. 


I will post the "how to" steps for the Nature's Beauty ATC next time.  In the meantime, here are some ATCs I finished today for a Tim Holtz techniques atc swap (sorry, Joanne, this is the nearest I've come so far to making my TH-style "grunge" pages - I'm still at the "thinking about them" stage)! 
                                                                                                                                                                   
"Destination"

TH/Rangers items used:

Alcohol Inks
COM005 Hotel Stamp
Grungeboard Arrow
Metal 'Journey' Embellishment

"Life"

TH/Rangers items used:

Distress Inks
Background (X's) Stamp
Archival Ink - Plum
Metal 'Life' Key
Alcohol Inks

"Flight"

TH/Rangers items used:

Distress Inks
Paint Dabber
Archival Ink - Sepia
Distress Stickles
TH 'No Journey ....' Stamp


Monday 22 March 2010

How I made .......

Ok, as promised, here are some steps and pics to show how I created the "Fill Each Day with Joy" ATC.  It's not exactly the same, because I'd run out of the background sheet I used in the original design (in a previous post), but it will show the process that I used to make it.

Items you will need to create a similar ATC are - Card 2.5" x 3.5" for base; decorative paper with words (eg from Crafty Individuals 'Trees' or 'Springtime' books); a strip of music sheet paper; double-sided tape; glue stick; Archival ink - Plum; Bird and Word stamps; glitter or paper flower; eyelet; ribbon & fibre; permanet black pen (I used a Copic Multiliner); silver Krylon pen; and glue dot.

Step 1: Cover the ATC card with decorative paper (in landscape view) - try to use paper with with little words or phrases on it and position the text you like on the right-hand side of the card.


Step 2: Using plum Archival ink, stamp your chosen "bird" image along the bottom left-hand side of the card, making sure not to stamp over the text you've selected.


Step 3: Tear a thin strip of music sheet paper and glue to the top left-hand corner of the card.


Step 4: Stamp a word phrase with the plum ink in the right-hand corner of the card.


Step 5: Edge the card with a silver Krylon pen and use a glue dot to adhere a glitter flower to the bottom right corner of the ATC (you could use a paper flower with a self-adhesive gemstone in the centre if you prefer).


Step 6: Punch an eyelet into the top left of the card and tie through with a selection of ribbons and fibres.


Step 7: Finally, add extra musical notes all over the ATC, using a permanent black pen .... and here is the finished card.

"Springtime Joy"


I hope this gives you some ideas for creating your own ATCs, using simple paper, ink, stamps and embellishments - if you come up with your own version of this card, I'd love to see what you do!  I've also got some instructions for recreating the "Nature's Beauty" ATC (see previous post), but need to retake the finished photo of it, so I'll save it for another day.


Saturday 20 March 2010

ATC Techniques

Just a quickie to say thanks for the comments about the ATCs I posted recently.  I was asked if I could give details how I made some of these, so I thought I might re-create (but not exactly) one or two of them with some step-by-step photos for those who wanted to know.  I've been too short of time the past couple of days to do this, but promise I'll work on them soon as I can (just didn't want anyone to think I ignored their comments)!  :o)

Today I picked up an old copy of Jules Verne's "Around the World in 80 Days" in a local charity shop ..... a very opportune find as the idea of running some kind of swap in the future with this as the theme has been going round in my head for quite a few weeks now.  I remember seeing the film version of this starring David Niven, but I never got round to reading the book so I may just give it a go and then formulate (hmm, does that sound like the right word?) the swap from there ....... it wouldn't be till later in the year, but I hope there'd be some good interest in it, it'd definitely have a vintagey/Victorian feel to it.  What do you think?

Tuesday 16 March 2010

Vintage Children Images and some more ATCs

Thought I'd post a few vintage images for you to use as you wish in your artwork - they're from my collection of cabinet cards, two feature babies and the third a young child. 


I've many more vintage images (of ladies, gents, children and family groups) so I'll continue to post pics from my collection every so often - in fact, I have plans to feature some of them in the next monthly swap.  (The butterflies are flying in now for the current swap and lovely cards they are too, so if you want a chance to receive some beautiful ATCs yourself then there's still time to sign up).

A few days ago I lost a chunk of tooth (a back wisdom tooth) whilst eating a sandwich - I felt a bit of a crunch and thought it was eggshell, but apparently not - it must've been the old filling coming out - yuck!  Anyway, it meant a trip to the dentist the next day for a rather large filling and as a consequence over the past few days I've been feeling very sensitive with my teeth, trying to avoid anything too "crunchy" and taking painkillers as it's still very achey (just hope it settles down)! 

As a consequence, I've not spent as much time as I'd have liked working on atcs and journal pages.  But here are a few pics of the ATCs I've managed to create in the past week - some were for a monthly swap on one of my Yahoo groups, we have a new partner each month and swap three cards (any theme).  The other cards are extras I've made for my swapping stash. 

These three cards were sent to my partner Liz for the March swap.

"Fill Each Day with Joy"

"Nature's Beauty"

"Paris Passion"

"Psychedelia"

I've treated myself and booked onto THREE workshops that my sister Lindsay is running at Dawn Bibby's Design Studio in Oswaldtwistle - I've promised to behave myself and not heckle at all *LOL*.  Well, everyone always looks like they're having such a good time in the pictures Lindsay posts on her blog and I wanted to join in the fun myself too.  The workshops I'm signed up for are her Mirror Frame in April, a Secret Canvas in June and Rangers Techniques and ATCs in July (check out this link to Dawn's shop if you want to book on any of the workshops).  I'm really looking forward to them!


Tuesday 9 March 2010

Collaged Birds

I've been finishing off some ATCs for a Collaged Birds swap this week.  We had to create four cards, with collaged backgrounds and featuring a bird on them.  For my cards I used ATC-sized pieces cut from backgrounds I created some while ago, based on the "Inky Layers" technique in Bernie Berlin's book, "Artist Trading Card Workshop".  Basically, this consisted of layering down a mixture of papers, images, etc, some with inked edges, then sponging dye ink randomly over the top.  Over this you apply a layer of coloured glazing medium (I used a gel medium) and then more inks (pigment and irridescent).  It's a case of creating a look that you like and using whatever you have to hand, for example Twinkling H2O's would work as a final layer instead of the liquid inks. 

Over these collage backgrounds, I added the bird imagery, to tie everything together.  For instance, I added the "scrabble" words "Bird Call" to one card, because part of the collaged background included a torn piece from a telephone directory with the telephone numbers displayed.


Birds are one of my enduring favourite themes so I really enjoyed making these cards.

For anyone who's interested, there's still plenty of time to sign up for the Butterflies and Dragonflies swap - you have until 31st March to send your cards to me. 

Monday 1 March 2010

New ATC Swap - Butterflies & Dragonflies

Okay, it's the 1st of the month and, as promised, I'm posting a new ATC swap - this will be the first of a regular monthly swap slot - sometimes they'll be atc swaps, other times they might be for something different - but hopefully you'll find them interesting enough to join in, whether you're beginners or more advanced.

So ...... we've begun March and the sun is shining, the skies are blue (never mind the sleety stuff I got caught in this morning, that's all gone now) ..... so there's a definite "springy" feel in the air now.  Which made me think about lots of colour - bright blues and pinks, soft greens and lemony yellows, and the shimmer of light on a pool of water, the flash of irridescence on a dragonfly wing and the fluttering of a butterfly resting on a flower.  So what better theme could I start of with than "Butterflies and Dragonflies"?  (Quite an interesting contrast to the "grunge" book swap as well)!

Details of the swap are posted in the sidebar, the deadline will be the last day of the month, so if you're interested, then please email me to sign up.

Here are pics of some items I've made in the past, where dragonflies or butterflies feature:-


This piece was created on canvas, using decorative papers, paint, embossing, Crafty Individuals stamp, stamped quote, microbeads, paper flowers and brads, edged with gold Krylon pen.  The collaged butterfly was covered with Glossy Accents.


These were all atcs that I've made for swaps in the past.

I had a lovely surprise in the post this morning - I won a prize in a magazine giveaway.  Look what I got ...... these are going to come in so useful for my art, specially for any journalling (or squiggles!) that I do! 


It really perks your day up when the postman brings you something lovely and unexpected (and that's NOT a bill!).

Sign up for the "grunge" chunky book swap will close after tonight, at the moment there's one place still available if anybody wants to have a go, and then I'll be sending out full details of this swap to all those who are participating - so get ready to "grunge"!